Mantles. They can have so many looks and completely set a tone for a room. It can also be a major eyesore that catches attention for all the wrong reasons. The fireplace that we walked into was neither of those things. It was just simply meh. With a 90’s trim flat against the wall and the giant soffit hovering over the wall, it was overbearing, dated, and boring. We knew we needed a change and got our inspiration from HGTV’s show Windy City Rehab where the host takes antiques and builds them into new homes to give them life and character. When we found the perfect fireplace mantel antique, we knew that’s what we were going to do.
Ugh do you see this? It was just so blah.
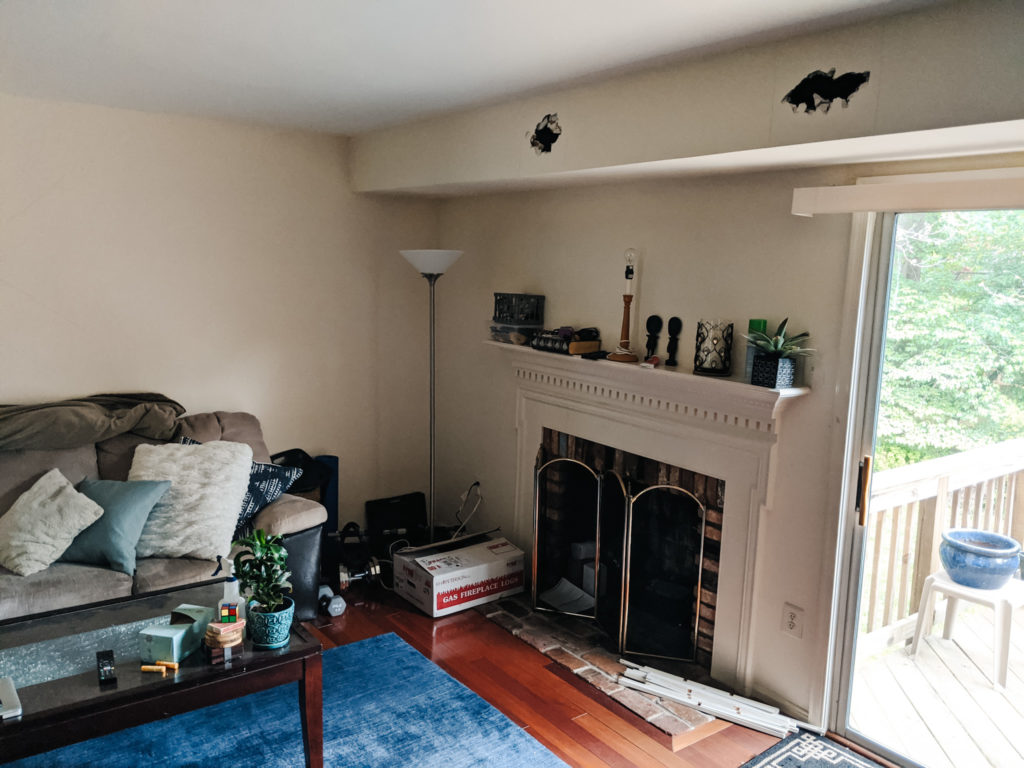
Before we could do anything, we had to get rid of the old mantle and figure out what was going on with that soffit. Turns out, it was hiding pipes that ended right above the mantel and the rest was just open… don’t you just love 80’s architecture?
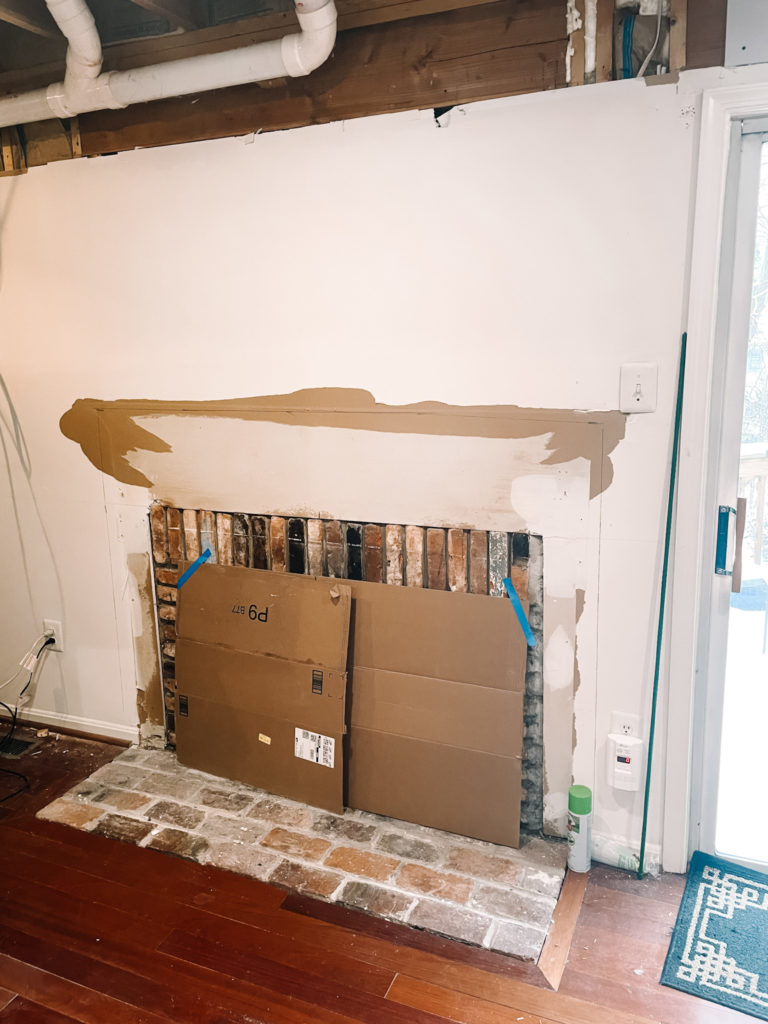
We were able to pull the mantel off in one piece and sell in on craigslist to a woman that really needed it.
Now the work begins. Before we could install the fireplace mantel antique, we had to build out the whole area.
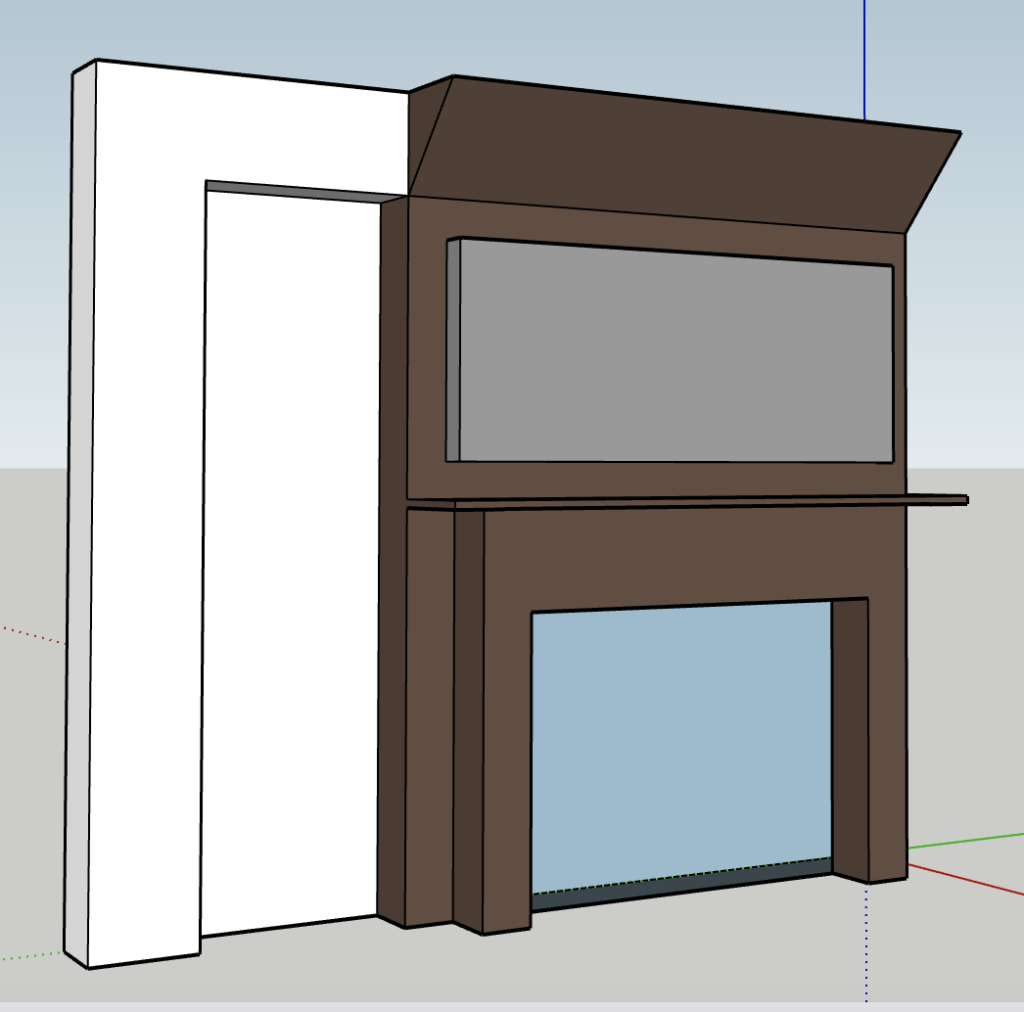
The goal is to make the whole mantel piece look cohesive like it was always one complete piece. We started with this design that the new mantel would sit on. The top needed to be slanted in order to hide the pipe that extends from the wall. The pipe will extend down wall and hopefully not be too noticeable.
The finished solution is decent. While the angled part to the ceiling was a little odd, I knew we could incorporate it in a way that it would look natural. My concern was the weird L shaped frame we were making around the remaining piping. Long term I’m thinking we can add some shelving to help camouflage the bump out a bit more.
The build out actually took quite a lot of time. We definitely over-engineered the mantle but we really wanted to make sure it could support the new fireplace mantel antique and the tv.
Since everything was opened up, we also took the time to build a pipeline behind the wall that will allow us to hide all the wiring for the tv and cable. Having fished wires through the wall before, this is a major upgrade. We used standard plumbing pipes from Home Depot and just combined the pieces until we got the angles we needed.
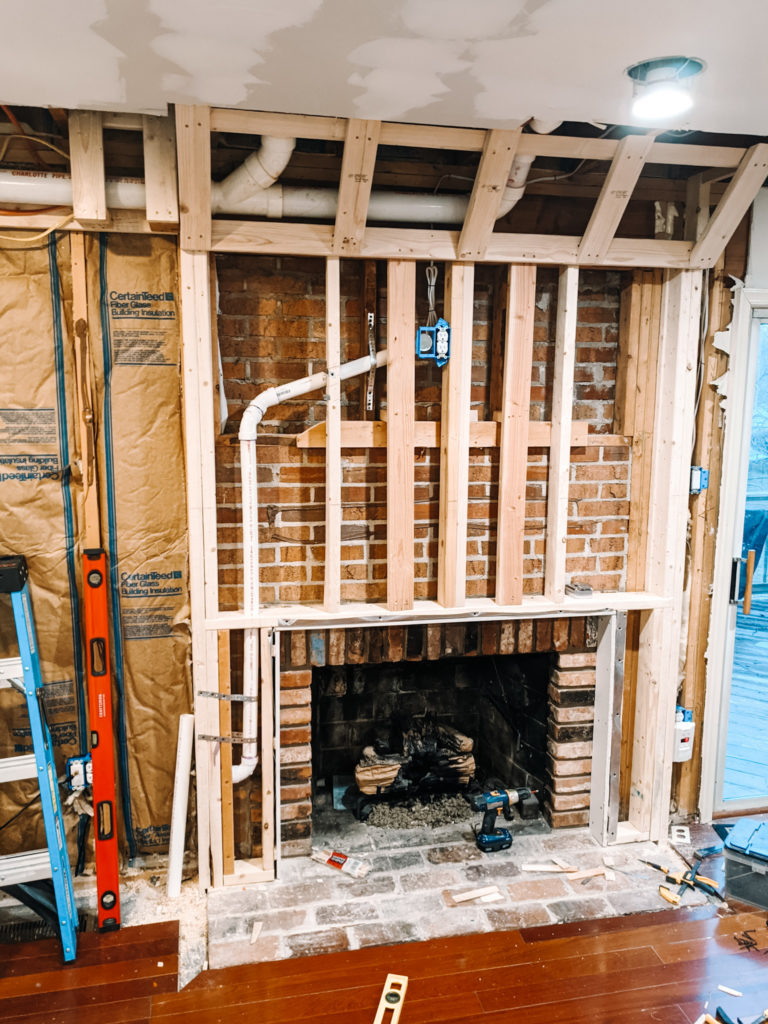
We also ran the electrical from a nearby outlet which would sit right next to the pipe behind the future tv mount.
Finally, we started adding drywall. The drywall directly around the fireplace opening needs to be Type X, fire resistant drywall just in case there are any sparks. For the rest of the fireplace we went with regular drywall as it’s much easier to work with. Here’s where we are. It’s got a long way to go but it’s a big improvement from where we started. Now that we have this ultra-modern base, it’s time to bring some character and life back using our fireplace mantel antique.


Leave a Reply